
The Tug Controller is an add-on for the Aerowinx 747-400 Precision Simulator. It allows control from the flight deck of plane ground motion, suitable to emulate a tug pushing/pulling the plane around.
Project Progress
2009-02-14 V1.7.1 is an experimental release that hopes to have a workaround for a suspect 747IPC2 (not 3) issue. If your speed brakes extend when the nose of your plane hits heading 000 true (not magnetic), you still have the problem...
2008-10-26 V1.7 sees mostly usability improvements. Hitching the Tug is now mandatory. This provides me with yet another moment to tell IPC to shut the f*** up in a desperate attempt to make Tug go away when its job is done. Also I added flaps lever position sensing, to avoid driving a Tug to a plane that intends to taxi out.
see all previous progress messages
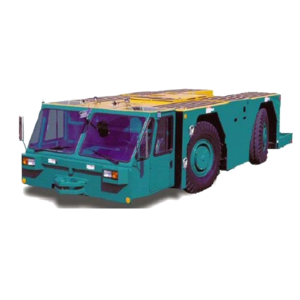
Ground Pushback Tug
All interactions with the Tug Controller go via the MCDU, so you do not have any weird tug control panel on your flight deck. The Tug Mode disappears from your MCDU MENU as soon as your plane moves under its own power.Installation
Fetch the installation file and run it. Usually you can accept all the suggestions.Tug works with any recent version of 747IPC, both 2.x and 3.x/WinPS1. Without one of these programs active, Tug won't do much. For full functionality, you need to activate the proper Tug keys, for which the VMREAD Wizard is recommended. Additionally you will need the MCDU.
Finished!
Operation
You need a working MCDU in order to operate the pushback tug.Just as with nearly all PS1 add-ons, the first time you run Tug, fill in the IP address of the computer on which your Broker runs in the File>Setup menu. You may then minimize the program, it does need no further interaction (some helpful messages may appear in the log window, though).
 If the plane is in a situation that a tug could be available (30 seconds
after it comes to a full stop), "TUG" mode will appear on the MCDU main
menu, like shown on the right. If the brakes of the plane are engaged, no
controls will be available. Tug controls are divided into two parts,
above and below the dashed line.
If the plane is in a situation that a tug could be available (30 seconds
after it comes to a full stop), "TUG" mode will appear on the MCDU main
menu, like shown on the right. If the brakes of the plane are engaged, no
controls will be available. Tug controls are divided into two parts,
above and below the dashed line.
The direct control part is above the line. You can see the current plane magnetic heading and ground speed in small font, and the desired heading and speed in large font. By entering a new heading or speed directly into the fields, using the scratch pad and LSK1L/R, you can make the tug push/pull the plane around. Alternatively, you may use the push buttons for heading and speed to change the values at line 1 incrementally. Take care that the plane has a lot of inertia, so don't expect race car-like behaviour! A tip: if you push back at the normal speed of -2 knots, you need to push your wing tips just over the yellow line and then do a 90° turn.
Below the line, you find hitch control and the semi-automatic pushback
controls. Hitch is only interesting if you have something else listening to
the tug.event Broker key, such as a motion platform controller. For
the operation of the Tug, being hitched (linked to the plane) or not is not
important. It is only a manually added event.
For the semi-automatic pushback, you need to tell the tug driver what you
want, but then can leave him alone to do his task while you attend to your
cockpit duties during pushback. After pushback, wait for the taxi clearance
by the tug driver before you taxi out! Imagine you wave back at him when
clearing the MCDU message.
Tug Driver Programming
You program the tug driver by entering two to four figures on LSK6L:
pushback_time/pushback_heading/pullout_time/pullout_heading
The first two figures are required. You need to tell the tug driver how far
(as in: how long in seconds) he needs to push you back, and then to which
heading he needs to turn the plane's nose. For your convenience, you may
either specify an absolute final nose heading in degrees magnetic, or a nose
heading relative to the plane's current heading. The latter you do via the
L and R letters for "nose Left" and "nose Right".
Just these letters will give you a 90° turn left or right. You may also
give the exact number of degrees left or right you want to be turned, with
L70 for 70° left. After entering letter codes, the program
will be translated to absolute degrees. An extra option is that you may give
a negative pushback time, which will give you a pullout (forward)
instead of a pushback.
The third figure is optional, and gives the time in seconds you want to be pulled out (forward) after pushback. If you give a negative time here, you will be pushed back further after the initial turn, again during the amount of seconds you gave.
The fourth figure is also optional, and if given tells the tug driver that you want to be pulled out (or pushed further back) with your nose in the given heading.
Of course, each gate/terminal will require a slightly different timing and
heading to put you exactly on the yellow taxi line, but you may spend as
much time on this as you like. The default setting pushes you back for 30
seconds, which is about a plane length, and then turns your nose to the
right to end up 90° from your initial (parking) heading. This is the
same as 30/R. You can give the default push a nose-left turn
by entering 30/L. With a bit of experience, you will quickly
get the hang of guesstimating from ground charts what pushback program you
will need, such as 50/R70 for about two plane lengths pushback
and a right turn just short of perpendicular.
A push-pull is not much more difficult. For your convenience, the
L/R codes here are taken relative to the final pushback
heading, not to the initial parking heading. So, as the most complex case,
if you want a tight nose-right pushback plus a pull-out 30° to the
right, you enter:
50/R70/60/R30
and you will be pushed back about two plane lengths with a nose-right turn of 70°, followed by a 60-second pullout while turning 30° further to the right.
The pushback programs are stable in time, so if you found a proper program
for a specific gate or terminal, you can write the figures down on the chart
and re-use them the next time. If you whine enough, I might provide some
table thingy so that you can enter EHAM/E24 and get the correct
(previously determined) program for Schiphol gate Echo 24.
Optional extras
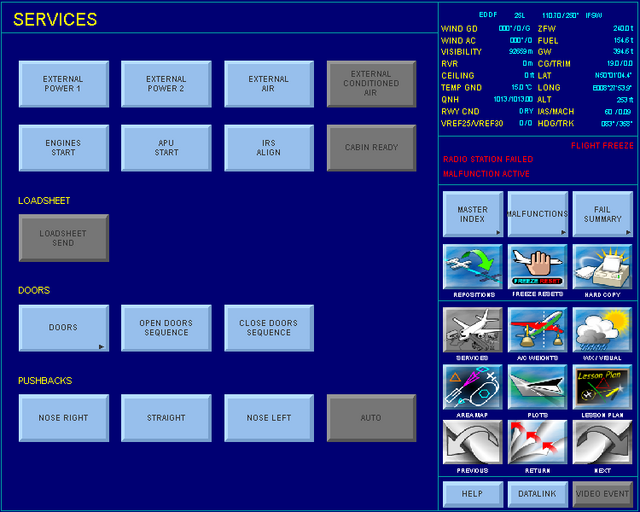
The Tug does not produce any sound, but if you install Rodney Redwin's FlightCrew II, you'll get a good tug sound plus a lot more.Below you see a screen shot of a real 747-400 full flight simulator. The pushback controls of such a multi-million machine are very coarse; the PS1 tug can do much more refined steering. But at the same time, the simple single-button options are all there!
Tug and other applications
The Tug uses a Broker key to tell its environment roughly what it is doing. The key is tug.event and it may receive the following values:
hitch The Tug links up with the plane (bump).
push The Tug starts pushing (plane reverses/sway).
pull The Tug starts pulling (plane forward/sway).
stop The Tug reaches zero speed (sway).
unhitch The Tug unlinks from the plane (bump).
Tug itself uses just one nonstandard IPC key to sense the plane's brakes:
27E8 2 A_INT 20 VM.BrakePow
The normal VMREAD Wizard has this key aboard.